Introduction
Students! Say goodbye to slowdowns, frustrating updates, and expensive new laptops. ChromeOS Flex is a game-changer, transforming your Windows machine into a streamlined, secure, and budget-friendly Chromebook. In this guide, we’ll walk you through everything you need for a successful transition, empowering you to focus on your studies, not technical hurdles.
Why ChromeOS Flex is the Perfect Student OS
- Lightning-Fast: Wave goodbye to sluggish startup times and program lag. ChromeOS Flex breathes new life into older laptops.
- Ultra-Secure: Baked-in security features defend against viruses and malware, keeping your data safe.
- Always in Sync: Your Google account is your passport. Files, bookmarks, and settings magically sync across any device running Chrome.
- No More Expensive Upgrades: Give your old laptop a powerful second act instead of shelling out for a new one.
- Schoolwork Dream: Google Workspace (Docs, Sheets, Slides, etc.) integration makes collaboration and completing assignments seamless.
- Distraction-Free: The simple interface helps you stay focused and minimize procrastination traps.
- Budget-Friendly: Breathe new life into an existing laptop instead of buying a brand new Chromebook.
Compatibility Check: Is Your Laptop Ready?
Before diving in, ensure your computer is a good fit. Google maintains a certified models list . Even if your exact model isn’t listed, similar ones from the same manufacturer might still work.
Essential Preparations
- Backup Your Treasured Files: Installing any new operating system wipes your hard drive clean. Back up documents, photos, etc., to an external drive or a cloud service like Google Drive, Dropbox, or OneDrive.
- Gather Your Supplies:
- A compatible PC or laptop.
- A USB flash drive (minimum 8GB capacity).
- Your Google account credentials. You may also need your school Google Workspace account info if provided.
Step-by-Step Installation Guide
- Create the ChromeOS Flex USB Installer
- Open a Chrome web browser on any computer (Windows, Mac, even an existing Chromebook).
- Visit the Chromebook Recovery Utility web page on the Chrome Web Store.
- Click “Add to Chrome” to install the “Chromebook Recovery Utility” extension.
- Launch the extension (you’ll find it under the puzzle piece icon in your Chrome browser).
- Click “Get Started.”
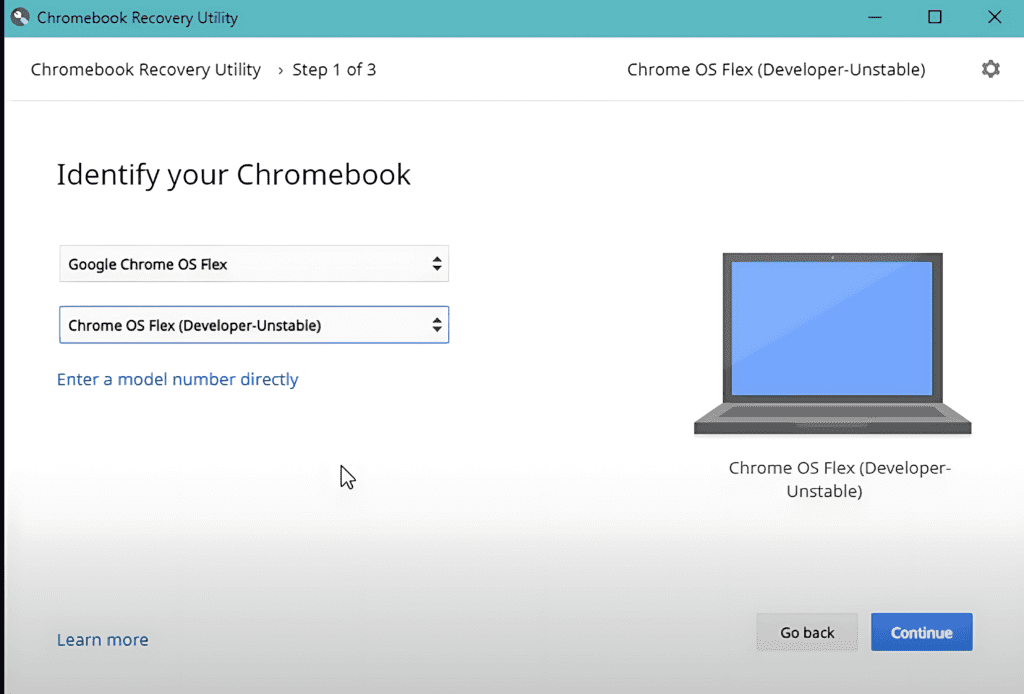
- Under “Select a model from a list,” choose “Google ChromeOS Flex” followed by “ChromeOS Flex.”
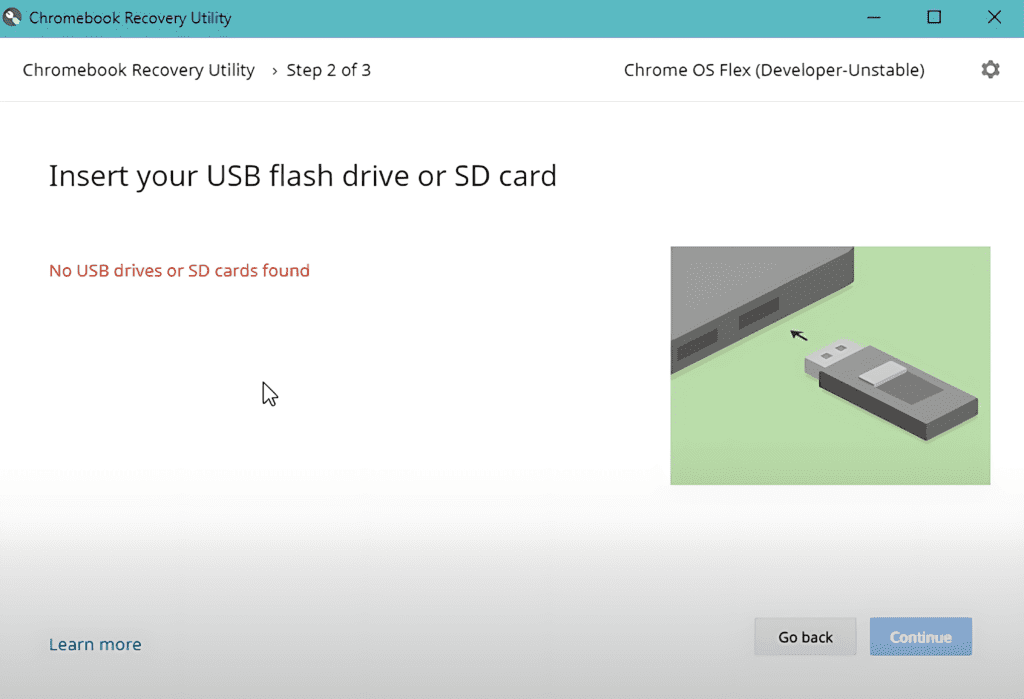
- Insert your USB drive and select it from the list.
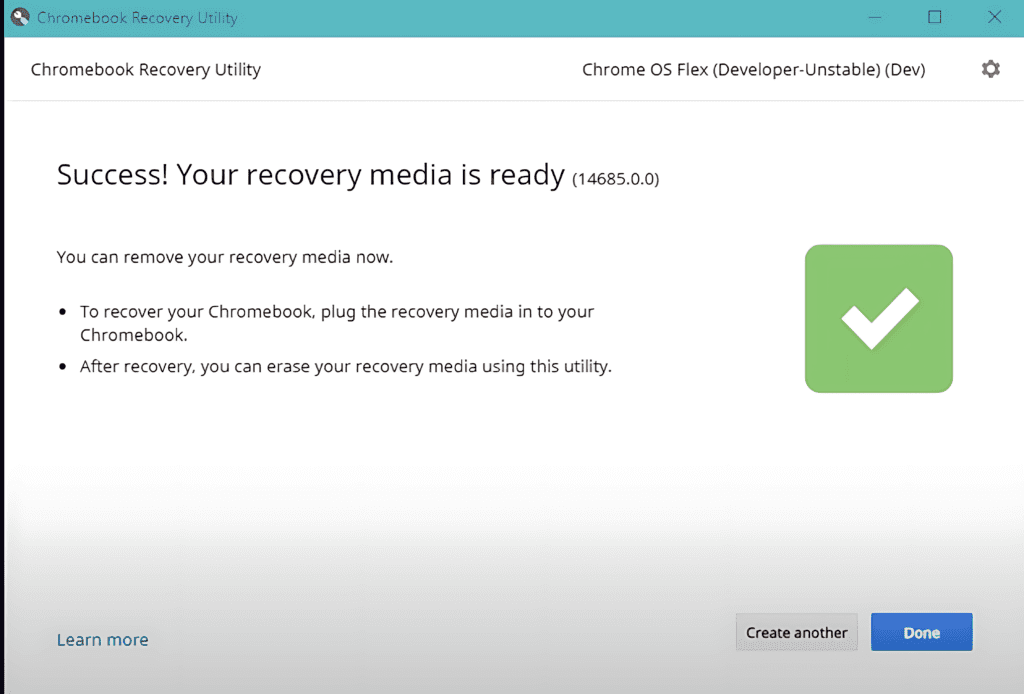
- Follow the simple on-screen instructions to create your bootable installer.

- Time to Boot from USB
- Shut down your target computer completely.
- Insert the ChromeOS Flex USB drive.
- Power on your computer and immediately start pressing the boot selection key, which varies by manufacturer (usually F12, Del, or Esc). An on-screen message usually tells you the correct key.
- Choose your USB drive from the boot menu options.

- Test Drive (Optional but Recommended):
- ChromeOS Flex can run directly from the USB. Test it out to check if your Wi-Fi, touchpad, and other essential hardware work flawlessly before committing to the installation.
- Let’s Install ChromeOS Flex
- If you’re happy from the test run, follow the easy on-screen wizard.
- Key Reminder: Installation erases your existing hard drive data, so ensure your backup is secure!
- Select your language, keyboard preferences, and connect to your Wi-Fi.

- Welcome to Your New Chromebook!
- Sign in with your Google account. Your settings and some Chrome data will sync.
- If your school uses Google Workspace for Education, you have the option to sign in with that account too.
Getting Familiar with ChromeOS Flex
- The Basics: The user interface is similar to Chrome but with a few key differences. Explore the launcher (like the Start menu), the shelf (like the taskbar), and settings.
- Installing Apps: Access the Play Store to download Android apps or use web-based apps from the Chrome Web Store.
- Managing Files: Google Drive is the primary storage system, but you can also use external drives or cloud services.
Tips for a Smooth Transition
- Keyboard Shortcuts: Learn handy ChromeOS Flex keyboard shortcuts to speed up navigation.
- Cloud Storage: Embrace Google Drive and other cloud storage options to keep your work safe and accessible from anywhere.
- Touchpad Gestures: If your laptop has a touchpad, learn the multi-finger gestures for easy navigation.
- Get Support: Refer to Google’s ChromeOS Flex Help pages: https://support.google.com/chromeosflex for support or ask in student tech forums.


